
LAURAS OSTERHÜHNCHEN

After getting so many requests for my Easter chicks sewing instructions in English...here you go!

MATERIAL:
- colourful Cotton fabric
- Crafts Felt ( about 0,2-0,3mm in thickness) in diverse coulours
- Filling material ( cotton or any other crafts wadding)
- Strips of Jersey ( width about 1cm), alternatively strips of any other fabric (width about 0,5 cm) or woollen yarn.
- black pearls for eyes ( 2 per chick)
- sewing thread, colour matching your chosen fabric
SEAM ALLOWANCE:
A seam allowance of 0,5 cm has already been counted in the sewing pattern.
HELPFUL HINTS:
- You can produce chicks in any size by simply enlarging or reducing the size of the pattern on your printer or copying machine.
- If you have the intention of making hanging objects remember to add a loop of yarn or ribbon on the upper seam before combining the pieces. On small chicks you can also add it later by simply threading through with a needle.
- As filling you can use cotton ( or other) wadding, filling granules, grape seeds, spelt berries, rapeseed, or any other crafts filling material provided from certified craft stores and retailers.

Cut the body out of double fabric laying right sides facing each other.
Mark the positions of comb, beak, shanks and tail as well as the reverse opening with chalk or a fabric marking pen according to the sewing pattern.
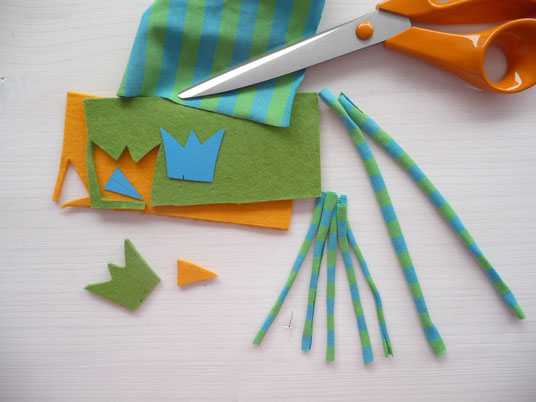
Cut comb and beak out of felt.
For the tail, cut a number of the Jersey strips (or alternative materials) into pieces of 10 cm length.
By stretching you can make them curl.
For the shanks, cut two 15 cm pieces out of the same material.

Place the 15 cm Jersey strips („shanks“) on the right side of the according fabric like and fasten by sewing within the seam allowance.

Place comb and beak on the right side of one of the belonging fabric pieces (facing inward, see picture) and fasten by sewing within the seam allowance.

If you are planning a hanging decoration remember to place a loop of yarn or ribbon on the according place before sewing the upper seam.

Place the other mirroring body on the other one, right sides facing each other.
Pre-fasten upper and front seam.
Make sure to keep the shanks from being accidentally sewn into the seam by rolling them up a bit.

Now sew the upper and front seam in once, getting comb and beak fastened at the same time.
Secure beginning and end of the seam with a few back stitches each.

Place the “tail” strips on the upper top of the back seam facing inward.

Sew the back seam.
Secure beginning and end of the reverse opening (that will be used to turn your work from left to right later) with a few stitches, but use long stitches within this opening (will be unravelled later).
Secure beginning and end of the whole seam with back stitches.

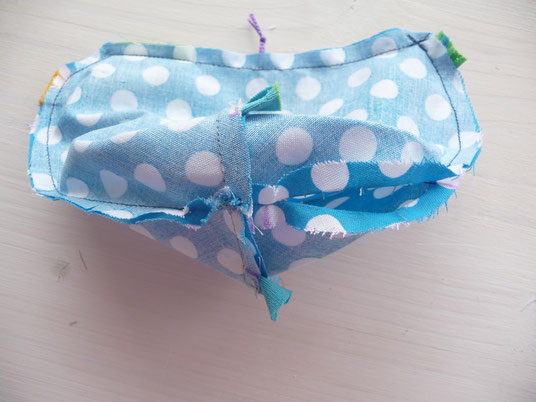
Press open the seam of front and back piece.
Pin the bottom right sides together and make sure that front and back seams are lined up.
Shanks pointing inside.

Sew the bottom seam.

Make small v-shaped snips on the curved parts of the seam allowance.
Seamrip the long stitches of the reverse opening.
Reverse the piece from left to right.
For pushing out the corners use either a dull needle or a knitting needle.
Fill your chick with the wadding of your choice.
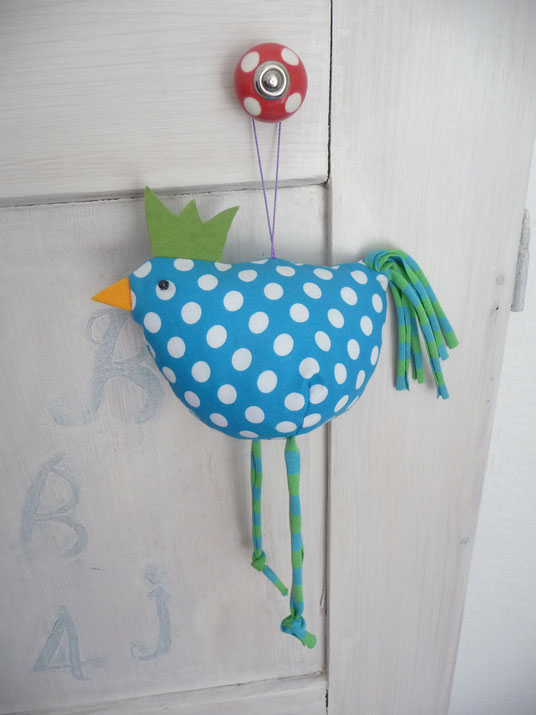
Close the reverse opening by hand, using small stitches.
For eyes, sew on the two beads.